I'm not one of those pinterest moms. I'm not a mom, first off. Second, I have never sewn anything in my entire life until this post. If you are in the same boat as me, welcome aboard!
Sewing! Scary. I can't do it. Hah. So...how do I do this tutorial?
I try.
Ha.
Anyway, for those of you who can sew out there, I applaud you. Please be as critical as you like of this post - "Those stitches are so viewable!" "That's not the right stitch!" "Use different thread!" and the like. I am not a sewer. I cannot sew. So this tutorial is the simplest of the simple. I promise.
Literally, anyone who can't sew, grab your glue. We can use that. I should have. Because I can't sew.
Materiels for NO-SEW:
-Measuring tape
-Unclothed doll
-Glue
-Fabric in two different colors (I used blue and white)
-Yarn/ribbon
-Bobby pin/crochet hook/needle/something like that
Materiels for SEW:
-Measuring tape
-Unclothed doll
-Needle
-Thread
-Basic knowledge of how to sew
-Fabric in two different colors (I used blue and white)
-Yarn/ribbon
-Bobby pin/crochet hook/needle/something like that
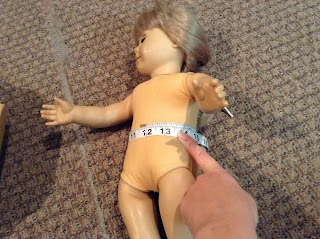
Step 1 - BOTH: Measure your doll's waist. Add two inches over how wide it is. For a poofier skirt, add more inches around the waist. You can even double it. (I got 14 inches.)
Step 2 - BOTH: Then measure how long you want the skirt to go, and add two inches to that. I think I got 6-7 inches...something like that.
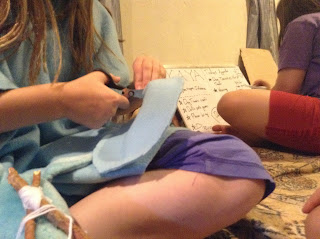
Step 3 - BOTH: Then, cut off that much fabric of your dominant color. I got 14 inches wide, 7 inches tall. Your secondary color is different. Set it to the side without cutting it.
Step 4 - SEW: Grab your needle and thread.
NO-SEW: Grab your glue.
Step 5 - SEW: Measure your thread. I did about the length of my arm. Doubled. Make sure to double your thread. Then string it on, knot it, and yeah. Go look up something online to do this if you don't know how to. Or do the no-sew version, it's much easier. And faster.
NO-SEW: Just unscrew your glue cap.
Step 6 - SEW: Fold over one end a tiny bit to hem it. Like so. Remember to pin it down to stabalize it. Hem both sides. You should know how to do this, because you can sew. Otherwise, do the no-sew glue version. I'm serious!! IMPORTANT: The top hem should be pulled down so it's about an inch wide, so you can pull either your yarn or ribbon through it!!
NO-SEW: Fold over the edge of the wider sides. Pin it down with safety pins. Then glue along the inside, so that the frayed side is on the "wrong" side of your fabric (the side you think is uglier). Try to follow along with the pictures, only with glue, not thread. Then do the same thing to the other wide side. IMPORTANT: The top hem should be pulled down so it's about an inch wide, so you can pull either your yarn or ribbon through it!!
Step 7 - BOTH: Flip your fabric over. It should look like this. Ish. For those of you non-sewers, no threads should be seen. And for those of you good sewers...no threads should be seen. Ha.
Step 8 - BOTH: Now take out your secondary fabric. Match up the length you want it - 7 inches - and hem it just like you did with the first color (gluing it or sewing it) so it's the same length as the first color. IMPORTANT: Remember that the top hem should be pulled down so it's about an inch wide, so you can pull either your yarn or ribbon through it!! It can be as wide as you want it to be. The following picture shows it on the "wrong" side:
Step 9 - BOTH: Now, place both the main and secondary colors down on the wrong side, with the secondary color slightly overlapping the base color, like so:
Step 10 - SEW: Begin to do what I call an "overstitch" - over, over, over.
NO-SEWERS: Glue it down so that the secondary color overlaps the base color.
Step 11 - BOTH: Now flip it over to make a circle, still on the "wrong" side. Repeat step 10, whether you glued or sewed.
BOTH - That top hem you did should be pretty wide. I told you to make it that way. If you didn't, shame on you. This will be harder for you to acccomplish. Use your bobby pin or crochet hook or whatever you have to pull your yarn or ribbon through the top hem.
At the end of pulling it through, it should look something like this.
BOTH: Now flip it inside out to the "right" side.
BOTH: Slip it onto your doll and tie the yarn tightly around the doll's waist. then tuck the extra yarn into the dress. If you used ribbon instead of yarn, let it hang in a pretty bow.
And that's it! Remember, a poofier skirt comes from adding more inches to the waist.
DOES THIS POST NEED CLARIFICATION?
Tell me in the comments. I promise you I'll fix the directions as best as I can, depending on your feedback.


